Discover the art of hearing aid maintenance with our guide on ‘How to Clean Your Hearing Aid.’ Explore expert tips, troubleshooting advice, and common mistakes to ensure your device delivers pristine sound quality. Elevate your hearing experience with the ultimate cleaning routine today.
Introduction

Maintaining the cleanliness of your hearing aid is crucial for optimal performance and longevity. In this guide, we’ll delve into the step-by-step process of cleaning your hearing aid effectively, ensuring that you get the best auditory experience possible.
Understanding the Importance of Regular Cleaning and How to Clean Your Hearing Aid
Why Cleaning Matters
Regular cleaning is paramount to ensuring a clear sound output from your hearing aid. Dust, debris, and earwax can accumulate over time, affecting the device’s performance.
Prolonging the Lifespan
Cleaning your hearing aid regularly helps prevent damage and increases its durability. It ensures that the delicate components remain in good condition, extending the overall lifespan of the device.
Hygiene and Health
By keeping your hearing aid clean, you reduce the risk of ear infections and promote overall ear health. A dirty hearing aid can harbor bacteria, potentially leading to health issues.
Basic Tools You’ll Need to How to Clean Your Hearing Aid

Soft Cloth and Brush
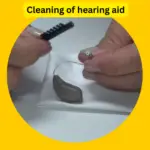
To clean the surface of your hearing aid, use a soft cloth to wipe away dirt gently. A small brush can help remove particles from hard-to-reach areas without causing damage.
Wax Pick or Loop
A wax pick or loop is essential for removing wax build-up from the ear molds and tips. This ensures clear sound transmission and prevents any blockages.
Cleaning Solutions
Invest in specialized cleaning solutions designed for hearing aids. These solutions are safe and effective for disinfecting the device without causing damage.
Step-by-Step Guide to Cleaning Your Hearing Aid

Power Off and Remove Batteries
Before cleaning, turn off your hearing aid and remove the batteries to prevent any electrical mishaps. This ensures your safety during the cleaning process.
Wipe Down the Surface
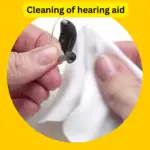
Using a soft cloth, gently wipe down the surface of the hearing aid to remove any dirt or debris. Pay attention to the nooks and crannies where dust may accumulate.
Clean Ear Molds and Tips
Regularly clean the ear molds and tips to prevent wax buildup. This helps maintain clear sound transmission and ensures the longevity of your device.
Use a Wax Pick or Loop
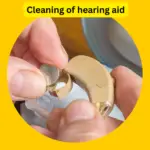
For a thorough clean, use a wax pick or loop to reach small crevices. This step is crucial for preventing any blockages that may affect the device’s performance.
Inspect for Moisture
Regularly check for moisture in and around your hearing aid. Moisture can lead to damage over time, so it’s essential to keep the device dry.
Clean Battery Compartment
Ensure the battery compartment is free from any debris. This promotes proper contact and efficient power distribution for your hearing aid.
Disinfect with Safe Solutions
Use specialized cleaning solutions to disinfect your hearing aid. This step is crucial for maintaining hygiene without causing harm to the sensitive components.
Check for Damage
Regularly inspect your hearing aid for any signs of damage. Catching issues early can prevent major problems and extend the device’s lifespan.
Common Mistakes to Avoid
Avoid Using Harsh Chemicals
Steer clear of using harsh chemicals or cleaning agents, as they can damage the sensitive components of your hearing aid. Stick to recommended cleaning solutions.
Don’t Forget to Power Off
Always turn off your hearing aid before cleaning to avoid accidental damage. Removing the batteries adds an extra layer of safety.
Not Checking for Moisture Regularly
Failing to check for moisture regularly can lead to long-term damage. Moisture is a common cause of malfunctions in hearing aids.
Tips for Troubleshooting
Low Sound Quality
If you experience low sound quality, check for wax build-up or consult your audiologist for adjustments.
Whistling or Feedback
Adjust the volume or check for proper fit. If issues persist, consult your audiologist for further adjustments.
Regular Professional Check-ups
Schedule regular check-ups with your audiologist to ensure the long-term functionality of your hearing aid.
Conclusion
By following these detailed steps, you can ensure that your hearing aid remains in top-notch condition, providing you with clear and crisp sound for years to come.
FAQs
- Q: How often should I clean my hearing aid?
A: Cleaning your hearing aid daily is recommended for optimal performance. - Q: Can I use regular cleaning wipes for my hearing aid?
A: It’s best to use a soft cloth and specialized cleaning solutions to avoid damage. - Q: What should I do if I encounter persistent issues after cleaning?
A: Consult your audiologist for a professional inspection and adjustment. - Q: Are there specific cleaning practices for in-ear and behind-the-ear hearing aids?
A: Yes, each type has its unique cleaning requirements. Refer to your device’s manual for guidance. - Q: Is it safe to immerse my hearing aid in water for cleaning?
A: No, water can damage the internal components. Stick to dry cleaning methods.


2 thoughts on “How to Clean Your Hearing Aid: A Comprehensive Guide”